You've had that aloe vera plant for a while now. It's been sitting in the same pot, maybe it's looking a bit cramped, or you noticed some pups (baby plants) crowding the base. The thought of transplanting it crosses your mind, followed immediately by a wave of anxiety. What if I kill it? What soil do I use? When is the right time? I've been there. I've also made the mistakes so you don't have to. Transplanting aloe vera isn't just about moving dirt; it's about understanding what the plant is telling you and giving it a fresh start. Done right, it's the single best thing you can do for its long-term health. Let's get into it.
What You'll Learn in This Guide
Why Your Aloe Vera Needs a New Home
Aloe vera is a tough plant, but it sends clear signals when it's unhappy with its living quarters. Ignoring these is how you end up with a stagnant or dying plant. Here are the non-negotiable signs it's transplant time:
- Roots are escaping. This is the big one. If you see roots poking out of the drainage holes or circling the top of the soil, the pot is officially too small. The root system has nowhere else to go.
- It's top-heavy and wobbly. The plant has grown so much that its weight isn't supported by the root ball anymore. It looks like it might tip over. This often happens with older plants that have never been repotted.
- You see multiple "pups" or offshoots. Aloe vera reproduces by sending out baby plants from its base. A few are fine, but a crowded cluster means they're competing for water and nutrients. It's time to divide and conquer.
- The soil looks exhausted. After a year or two, the potting mix breaks down, compacts, and loses its ability to drain properly. Even if the plant isn't root-bound, fresh soil gives it a nutrient boost and prevents waterlogging.
- Stunted growth. If your aloe hasn't put out new leaves in an entire growing season (spring/summer), and you're sure it gets enough light, it's likely root-bound.
I made the mistake of waiting too long with a large aloe once. When I finally pulled it out, the roots had formed a solid, impenetrable mat. The plant was barely absorbing any water. It took serious surgery to fix.
The Best (and Worst) Time to Repot Aloe
Timing isn't everything, but it's close. Aloe vera, like most succulents, handles stress best when it's in its active growth phase.
You can repot in early fall if you live in a mild climate, but avoid winter and early spring. The plant is semi-dormant then, and root growth is minimal. A damaged root from transplanting in cold, damp soil is a prime target for rot.
What if your plant is in dire straits right now—root rot, broken pot? Then repot immediately, regardless of season. Emergency surgery trumps the calendar. Just be extra careful with watering and keep it in a warm, bright spot.
Gathering Your Transplant Toolkit
Don't start with the plant. Get everything ready first. This makes the process smooth and minimizes the time your aloe's roots are exposed to air.
The Right Pot is Non-Negotiable
Material: Terracotta or unglazed ceramic is my strong preference. They're porous, which allows the soil to dry out from the sides as well as the bottom, dramatically reducing the risk of overwatering. Plastic pots retain moisture much longer—fine if you're a chronic under-waterer, dangerous for most.
Size: Here's a common mistake: going too big. Aloe likes to be slightly snug. Choose a pot that is only 1-2 inches larger in diameter than the current one. A huge pot holds too much wet soil around a small root ball, inviting rot.
Drainage Hole: This is not optional. It is mandatory. If a pot doesn't have a hole, it's a decorative cache pot, not a planting pot. Drill one or use it as an outer sleeve.
Crafting the Perfect Soil Mix
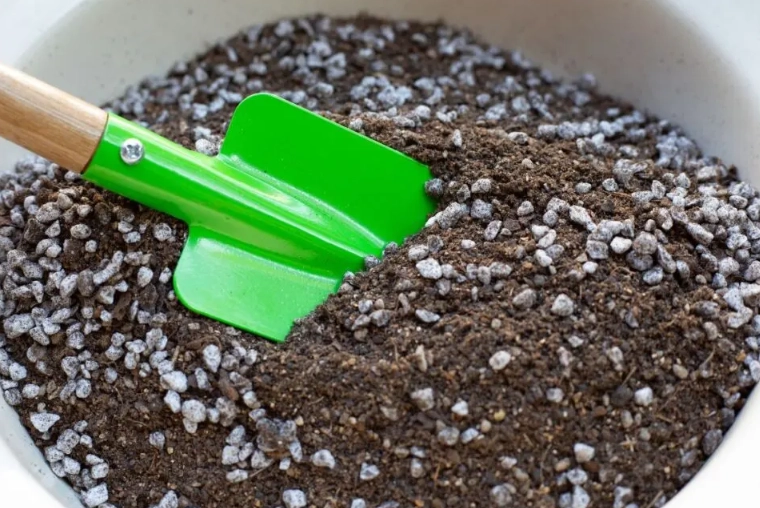
Bagged "cactus and succulent" soil from the store is a decent start, but I find it's often still too moisture-retentive on its own. It needs amending. Aloe vera in nature grows in gritty, well-draining soil. We need to replicate that.
Here's my go-to homemade mix. It's foolproof:
| Ingredient | Portion | Why It's There |
|---|---|---|
| Bagged Cactus & Succulent Potting Mix | 50% | Provides the base structure and some organic matter. |
| Perlite or Pumice | 30% | Creates essential air pockets and improves drainage dramatically. Prevents compaction. |
| Coarse Sand (Horticultural, not beach sand) | 20% | Adds weight and grit, further enhancing drainage and mimicking natural habitat. |
Mix these together thoroughly in a bucket before you start. You'll have enough for several transplants. This mix feels gritty and loose in your hands—that's exactly what you want.
Other Essentials
- Newspaper or a tarp: For containing the mess.
- Sharp, clean knife or scissors: For dividing pups and trimming any dead or rotten roots.
- Trowel or scoop: For handling soil.
- Gloves: Aloe sap can be a mild skin irritant for some, and it's sticky.
How to Transplant Aloe Vera Step-by-Step
Alright, everything is laid out. Let's do the deed.
Step 1: The Dry Exit
Do not water your aloe for at least a week before transplanting. You want the soil to be completely dry. Wet soil clings to the roots, making a mess and increasing the chance of tearing them. Dry soil will crumble away easily.
Step 2: Gentle Extraction
Lay the pot on its side. Gently squeeze the sides of a plastic pot or tap the rim of a ceramic pot against a table edge. The goal is to loosen the root ball. Slide the plant out. If it's really stuck, you can run a knife around the inside edge. Never pull on the leaves—you'll snap them. Hold the base of the plant.
Step 3: Root Inspection and Surgery
This is the most important step most guides rush through. Shake off the old soil. Be gentle but thorough. Now, inspect the roots.
Healthy roots are firm, plump, and light in color (white, tan, or yellow).
Unhealthy roots are mushy, dark brown or black, and may smell bad. These are rotten and must be removed.
Using your clean scissors or knife, cut away all rotten roots. Don't be shy. Leaving rot will spread it to the healthy plant. If you're dividing pups, look for where they connect to the mother plant. Often, they'll have their own small root systems. Use the knife to cleanly sever the connecting stem. If a pup has no roots, that's okay—it can still propagate.
Step 4: Pot Preparation and Planting
Place a piece of broken pottery or a mesh screen over the drainage hole to keep soil in. Add a 1-2 inch layer of your fresh potting mix to the bottom of the new pot.
Position your aloe (or its divisions) in the center. The base of the plant (where the stems meet the roots) should sit about half an inch to an inch below the rim of the pot. This gives you room to water.
Holding the plant in place with one hand, use the other to scoop your soil mix around the roots. Gently tap the pot on the table to settle the soil. Do not pack it down tightly—you need those air pockets. Fill to just below the plant's base. No part of the stem or leaves should be buried.
Step 5: The Initial Hold
Here's my controversial take: Do not water it yet. I know, it sounds wrong. But those roots have tiny abrasions and cuts from the transplant process. Watering immediately exposes them to moisture and potential pathogens. Instead, place the newly potted aloe in a spot with bright, INDIRECT light (no direct sun yet) and leave it alone for 5 to 7 days. This gives the roots time to callous over and heal.
The Critical Aftercare Most People Skip
Your job isn't over after planting. The next few weeks are crucial.
First Watering: After the 5-7 day waiting period, give it a thorough, deep watering. Water until it runs freely out of the drainage hole. This encourages roots to grow downward. Then, let the soil dry out completely before even thinking about watering again. This might take 2-3 weeks. Stick your finger in the soil—if it's damp, wait.
Light: Keep it in that bright, indirect light for about two weeks. Then, you can gradually reintroduce it to direct sunlight if that's its usual spot. A sudden move to full sun after the stress of transplanting can cause sunburn (brown, crispy patches on the leaves).
Hold the Fertilizer: Do not fertilize for at least 2-3 months. The fresh soil has nutrients. Fertilizing on stressed, new roots can chemically burn them.
What to expect? It's normal for the plant to look a little sad or for the outermost leaves to brown slightly as it redirects energy to root establishment. Don't panic. Resist the urge to overwater. In 3-4 weeks, you should see signs of new growth—a sure sign it's settled in.
Comments