Let's get straight to it. Propagating aloe vera isn't some mystical gardening art. It's a straightforward process that mostly involves not overcomplicating things. Most people think they need special skills or tools, but honestly, the biggest hurdle is patience and resisting the urge to overwater. There are two main ways to do it: separating the baby plants (pups) that grow from the mother, or trying your luck with a leaf cutting. One method is reliable and easy; the other is a bit of a gamble. I'll show you both, but I'll tell you right now which one I use every single time.
What You'll Learn in This Guide
The Two Ways to Propagate Aloe: Pups vs. Leaf Cuttings
First, understand what you're working with. Aloe vera is a succulent that reproduces primarily through offsets, commonly called "pups." These are genetically identical clones that sprout from the base of the main plant, connected by a short stem or rhizome. This is nature's preferred—and most successful—method.
Leaf propagation is a different story. It's possible, but it defies the natural growth pattern. A leaf cutting must generate an entirely new root system and growth point from its wounded base, which is energetically taxing for the plant. The success rate is significantly lower. Think of it this way: separating pups is like helping a teenager move into their first apartment. Leaf propagation is like trying to grow a whole new person from a severed finger. Which sounds more feasible?
How to Identify and Separate Aloe Pups
This is where most guides gloss over the crucial details. You can't just yank a pup out of the soil.
When is a Pup Ready?
A pup is ready for independence when it's about one-fifth the size of the mother plant and has developed its own set of several leaves. If it's only an inch tall with two tiny leaves, leave it. It's still drawing critical resources from the parent. A good rule of thumb: the pup should be at least 3-4 inches tall. I've made the mistake of separating them too early, and they just sit there, stagnant, for months.
The Separation Process: A Gentle Surgery
- Dry Soil is Your Friend: Water the plant a few days before you plan to separate. You want the soil to be completely dry on the day of the operation. Wet soil sticks to roots and makes a mess, increasing the risk of damage.
- Remove the Entire Plant: Gently tip the pot and slide the whole aloe family out. Brush away excess soil from the root ball so you can see the connections between the mother and her pups.
- Locate the Stem: Find the point where the pup attaches to the mother. Sometimes it's a clear, separate stem; other times, they share a tight cluster. Your goal is to preserve roots on both the pup and the mother.
- The Separation: This is the critical part. If the pup comes away easily with a gentle twist, perfect. If not, use a clean, sharp knife (I wipe mine with rubbing alcohol). Make a clean cut, ensuring the pup takes some of its own root structure with it. A ragged tear invites rot.
- The Callus Period: Here's a step almost everyone misses. Don't pot the pup immediately. Place it in a dry, shaded spot for 1-2 days. This allows the cut end to form a dry callus, sealing it against soil-borne bacteria and fungi. This one step prevents 90% of post-propagation rot.
How to Propagate Aloe from a Leaf Cutting (The Hard Way)
Okay, you're determined to try the leaf method. Maybe you have a big, beautiful leaf that broke off. Here's how to maximize your slim chances.
- Select a Healthy, Mature Leaf: Choose a thick, outer leaf. Use a sterile knife to make a clean cut as close to the main stem as possible.
- Let it Callus—For a Long Time: This is not a 24-hour job. Place the leaf cut-side-up in a dry, airy place out of direct sun. Let it sit for at least a week, often two. The cut end must be completely dry, hard, and sealed over. If you see any wetness or softness, it's not ready. Impatience here is the #1 reason for failure.
- Potting the Leaf: Fill a small pot with a dry, gritty succulent mix. Do NOT water it. Simply place the callused end of the leaf on top of the soil. Some people bury it slightly, but I find just setting it on top reduces rot risk. You can use a couple of small stones to keep it upright.
- The Waiting Game: Place the pot in bright, indirect light. Do not water. I repeat, do not water. The leaf has all the moisture it needs. Watering now will rot it before it even thinks about rooting. Wait for signs of new growth—tiny roots emerging from the callus or a new baby aloe forming at the base. This can take 4-8 weeks. Only when you see clear new growth should you begin very light, infrequent watering.
Potting, Soil, and Critical Aftercare Steps
Whether you have a pup or a rooted leaf, the next steps are make-or-break. The wrong soil is a death sentence.
The Perfect Aloe Propagation Soil Mix
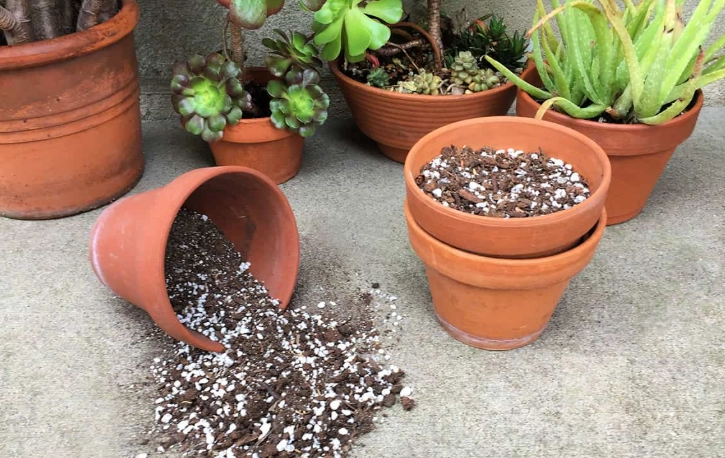
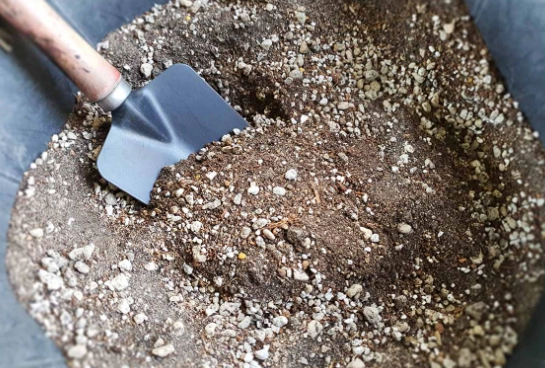
Forget regular potting soil. It holds too much moisture. You need a fast-draining, gritty mix. Here's my go-to recipe, which I've found works better than any store-bought "cactus mix" I've tried:
- 50% Regular Potting Soil: The base.
- 30% Coarse Sand or Grit: Horticultural pumice or perlite is even better. This creates drainage.
- 20% Coconut Coir or Fine Orchid Bark: Adds slight moisture retention without sogginess.
Mix it thoroughly. The pot is crucial too—always use a pot with a drainage hole. Terracotta is ideal because it breathes and wicks away moisture.
First Watering and Light
After the callusing period for pups (or after seeing roots on a leaf cutting), plant them in the dry soil mix. Now, wait another 2-3 days before giving the first light watering. This allows any minor root disturbances to heal. Water just enough to moisten the soil, then let it dry out completely. Place the new plant in bright, indirect light for the first few weeks. No direct, scorching sun—it's still recovering from the trauma of separation.
Top 5 Mistakes That Kill New Aloe Plants
After helping hundreds of people troubleshoot, these are the errors I see constantly.
- Watering Before Callusing: Planting a freshly cut pup or leaf into damp soil. This is rot city. Always let wounds dry first.
- Using a Pot That's Too Big: A small plant in a huge pot means the soil stays wet for far too long around the tiny root system. Use a pot just slightly larger than the plant itself.
- Overwatering in the Name of "Care": Aloe is a desert plant. Its worst enemy is constant wet feet. The "soak and dry" method is gospel: water deeply, then wait until the soil is bone dry before even thinking about more water.
- Insufficient Light After the Fact: Once established (after about a month), your aloe needs plenty of bright, direct light to grow compact and healthy. A dim windowsill leads to weak, stretched-out growth.
- Fertilizing Too Soon: Do not fertilize a newly propagated aloe for at least 6 months. It doesn't need the extra stress. Fresh potting mix has enough nutrients to sustain it.
Your Aloe Propagation Questions Answered
Propagating aloe vera is incredibly rewarding. That moment when a pup you separated months ago plumps up and starts throwing out its own new leaves is a quiet thrill. Stick with the pup method, be patient with the process, and resist the urge to hover with a watering can. Your aloe family will thank you by thriving for years to come.

Comments