Let's cut to the chase. Propagating aloe vera is one of the easiest and most rewarding things you can do as a plant parent. It's not about complex techniques or expensive gear. It's about understanding what the plant wants to do naturally and giving it a nudge. In my decade of growing succulents, I've seen people overcomplicate this simple process, leading to mushy leaves and dead pups. This guide will walk you through the three real methods—offsets, leaf cuttings, and seeds—but more importantly, it'll show you the subtle mistakes that kill your chances of success.
What's Inside This Guide
- Why Bother Propagating Your Aloe?
- The Three Ways to Propagate Aloe Vera (Quick Comparison)
- How to Propagate Aloe Vera from Offsets (Pups)
- Can You Propagate Aloe Vera from a Leaf?
- The Slow Road: Propagating Aloe Vera from Seeds
- Post-Propagation Care: The Make-or-Break Phase
- Your Aloe Propagation Questions, Answered
Why Bother Propagating Your Aloe?
It's free plants. That's the obvious answer. But it's more than that. A mature aloe vera plant will produce offsets, often called "pups," as a natural part of its growth cycle. If you leave them all crammed in the same pot, they compete for resources and the mother plant can become stressed. Propagation is essentially plant management. You're giving the pups their own space to thrive, rejuvenating the parent plant, and expanding your collection—or creating perfect, heartfelt gifts. There's a satisfaction in turning one plant into five that you just don't get from buying them.
The Three Ways to Propagate Aloe Vera (Quick Comparison)
Not all methods are created equal. Your choice depends on your goal, patience level, and what you have available. Here’s the honest breakdown:
| Method | Success Rate | Time to New Plant | Difficulty | Best For |
|---|---|---|---|---|
| Propagation from Offsets (Pups) | Very High (95%+) | 1-2 months to establish | Beginner | Fastest results, cloning the mother plant. |
| Propagation from Leaf Cuttings | Low to Moderate (30-50%) | 2-4 months for roots, 6+ months for a pup | Intermediate | When you have a broken leaf, not whole pups. |
| Propagation from Seeds | Moderate (if seeds are fresh) | 1+ year to a sizable plant | Patient Gardener | Creating genetic variety, growing rare hybrids. |
If you have a healthy mother plant with pups, start there. It's a slam dunk. The other methods are for specific situations.
How to Propagate Aloe Vera from Offsets (Pups)
This is the main event. Here's the step-by-step, with the details most guides gloss over.
Step 1: Identify the Right Pup
Look for pups that are at least one-fifth the size of the mother plant, with a few sets of their own leaves. A tiny, pale nub clinging to the base isn't ready. It needs to have developed some independence. A good rule of thumb: if it looks like a miniature version of the main plant, it's ready.
Step 2: The Separation (Gentle is Key)
Tools: Clean, sharp knife or garden snips. Rubbing alcohol to sterilize. I can't stress cleanliness enough. A dirty blade invites rot.
Gently brush away soil from the base to see where the pup connects to the mother. Sometimes it's by a thick stem (stolon), other times it's snug against the main stem. Your goal is to get some of the pup's own roots. If the connection is thin, you can often twist it off with your fingers. If it's thick, use your sterilized tool to make a clean cut. Try to preserve any roots already growing from the pup.
Expert Mistake Alert: The biggest error isn't during separation—it's what happens next. People immediately pot the pup in wet soil. That's a death sentence for the fresh wound. You must let the cut end callus over.
Step 3: The Critical Callusing Period
Place the pup in a dry, shaded spot with good air circulation for 24 to 48 hours. The cut end should form a dry, hard layer. This seals the wound and prevents soil-borne pathogens from causing rot. No shortcuts here.
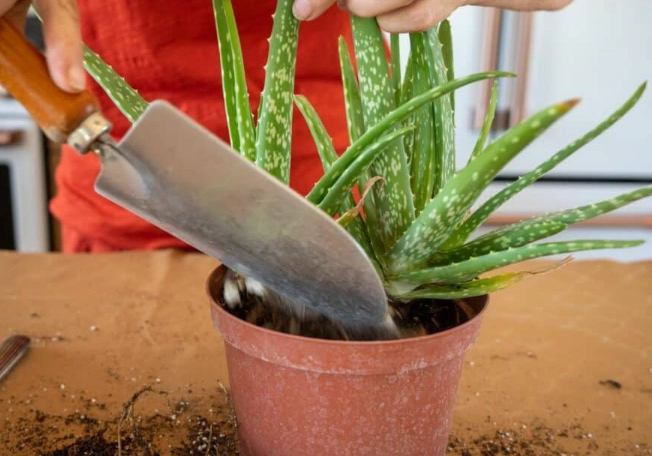
Step 4: Potting Up
Soil: Use a gritty, well-draining cactus/succulent mix. I often make my own with 2 parts potting soil, 1 part perlite, and 1 part coarse sand. Pot: A small pot (3-4 inches) with a drainage hole is perfect. Terracotta is ideal because it breathes.
Plant the pup so the base of its leaves is just above the soil line. Don't bury the leaves. Water lightly just to settle the soil, then… wait.
Step 5: The Initial Watering Wait
Here's the second biggest mistake: watering too soon. After that initial settling water, do not water again for at least one week, maybe two. The plant needs to focus on pushing out new roots into dry soil, seeking moisture. Constant dampness tells it there's no need to grow roots, and then rot sets in. Place it in bright, indirect light.
Can You Propagate Aloe Vera from a Leaf?
Yes, but it's finicky and unreliable compared to offsets. This method is best for when a leaf breaks off accidentally. Don't go hacking leaves off a healthy plant hoping for babies—it usually ends in disappointment.
The Process: Take a healthy, plump leaf from the outer part of the plant. Let it callus for several days until the cut is completely dry and hard. Then, simply lay it on top of dry succulent mix or place the callused end just barely in the soil. Do not bury it. Provide bright, indirect light.
The Reality: The leaf may root. It may even produce a tiny pup at the base of the cutting. But a huge percentage of the time, the leaf just slowly shrivels up without producing anything. It's a race between root formation and dehydration. This is why the success rate is low.
The Slow Road: Propagating Aloe Vera from Seeds
This is for the truly patient. Aloe vera flowers under the right conditions (mature plants, lots of light), and if pollinated, will produce seed pods. You can also buy seeds from reputable sellers.
Sow the seeds on the surface of a fine, moist seed-starting mix. Don't cover them; they need light to germinate. Cover the tray with plastic to retain humidity and place it in a warm spot (70-75°F). Germination can take from a few weeks to a month. Once sprouted, remove the plastic and provide strong light. Growth is glacial. You're looking at a year or more to get a plant of any significant size.
Post-Propagation Care: The Make-or-Break Phase
Your new aloe isn't out of the woods yet. Treat it like a fragile seedling, not a mature plant.
- Watering: The "soak and dry" method is gospel. Water thoroughly only when the soil is completely dry. For a newly potted pup, this might be every 2-3 weeks. Stick your finger in the soil.
- Light: Bright, indirect light is perfect. Avoid harsh, direct afternoon sun for the first few months, which can scorch the tender plant. An east-facing window is ideal.
- No Fertilizer: Don't even think about it for the first 6 months. The plant has no root system to use it, and it can burn the roots.
- When to Repot: When the pup has visibly doubled in size and is clearly root-bound in its starter pot (roots peeking from the drainage hole). This is a sign of success.
Your Aloe Propagation Questions, Answered
Propagating aloe vera is a simple pleasure. It teaches you patience and observation. Start with offsets, master that process, and you'll have more aloe than you know what to do with. Remember, the key isn't in the cutting—it's in the waiting: waiting for the callus, waiting to water, waiting for roots. Give the plant the time it needs, and it will reward you with generations of easy-care, useful greenery.
Comments