Let's be honest. You probably got your aloe vera plant because someone told you it's "impossible to kill." Then, a few months later, you're staring at a mushy, brown, or just sad-looking succulent wondering what went wrong. I've been there. I've killed my share of aloes by being too helpful with the watering can.
The truth is, aloe care is simple, but it's not mindless. These plants have specific needs that, once you understand them, make them incredibly resilient companions. This guide cuts through the generic advice and gives you the specific, actionable steps to not just keep your aloe alive, but to help it thrive and even produce "pups" (baby plants) for you to share.
What’s Inside: Your Quick Care Checklist
The #1 Rule: Give It Enough Light
This is where most indoor aloe struggles begin. Aloe vera is a desert plant. It craves bright, direct light.
What "Bright Light" Really Means
Forget "medium indirect light." For a happy aloe, think "sunny windowsill." A south-facing or west-facing window is ideal in the Northern Hemisphere. An east-facing window can work, but it provides less intense morning sun.
Here’s a simple test: if you can comfortably read a book in the spot without turning on a light during the day, it's probably not bright enough for an aloe long-term.
Can You Use Grow Lights?
Absolutely. If your home is cave-like, a simple LED grow light is a game-changer. Aim for a light that provides full-spectrum output and position it about 6-12 inches above the plant for 12-14 hours a day. It's less about fancy tech and more about consistent, bright photons.
Watering: The "Soak and Dry" Method Explained
Overwatering is the fastest way to kill a succulent. Your goal is to mimic the infrequent, heavy rains of a desert.
Forget the weekly schedule. I killed my first aloe by watering every Sunday. The soil never dried out, the roots rotted, and the plant turned to mush. The schedule depends on your light, pot, and humidity.
The Finger Test (The Only Tool You Need)
- Wait: Do nothing until the soil is completely dry all the way through the pot. Not just the top inch.
- Check: Stick your finger deep into the soil, near the drainage hole if possible. If you feel any moisture or coolness, wait.
- Soak: When it's bone dry, take the plant to the sink. Water thoroughly until water runs freely out of the drainage hole. This ensures the entire root ball gets hydrated.
- Drain: Let it sit in the sink or on a saucer until all excess water has drained out. Never let it sit in a saucer of water.
- Dry: Return it to its sunny spot and forget about it again. The cycle repeats.
In summer, this might be every 2-3 weeks. In winter, when growth slows and light is lower, it could be once a month or even longer. The plant will tell you—if the plump leaves start to look slightly thinner or feel less firm, it's getting thirsty.
Soil and Pot: Your Foundation for Success
Regular potting soil holds too much moisture. Aloe roots need to breathe and dry out quickly.
The Perfect Aloe Soil Mix
You want a gritty, fast-draining mix. Here are two options:
- Store-Bought Shortcut: Buy a bag of cactus & succulent potting mix. It's a good start.
- The "Gold Standard" DIY Mix (My Preference): Combine 2 parts cactus potting mix with 1 part perlite and 1 part coarse sand or poultry grit. This creates an airy, nearly impossible-to-overwater medium. The Missouri Botanical Garden recommends similar gritty amendments for succulent success.
Choosing and Using the Right Pot
| Pot Material | Pros for Aloe | Cons for Aloe |
|---|---|---|
| Terra Cotta / Clay | Porous, promotes evaporation, prevents soggy soil, classic look. | Dries out faster (requires more frequent checks), can be heavy. |
| Plastic | Lightweight, retains moisture longer, inexpensive. | Can stay too wet if you're a heavy waterer, less breathable. |
| Ceramic (Glazed) | Heavy and stable, many stylish designs. | Often lacks drainage holes, retains moisture the most. Use only as a cache pot. |
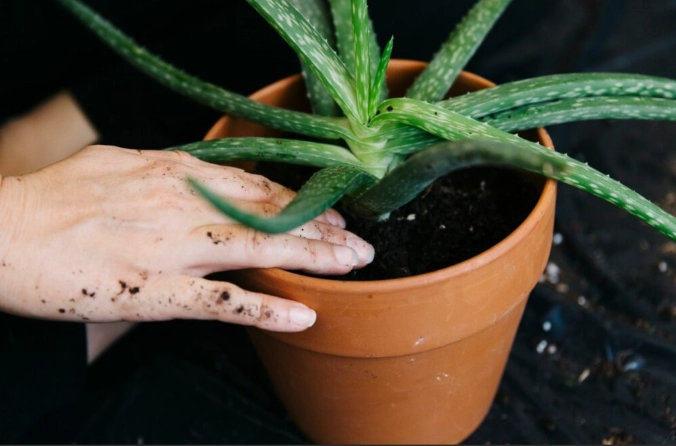
Pot size matters too. Aloes like to be slightly root-bound. Only repot when the plant is bursting out of its container or has produced many pups. When you do, go up only 1-2 inches in pot diameter. A pot that's too large holds excess wet soil around the small root ball, inviting rot.
Temperature, Humidity, and Feeding
Aloe vera is not fussy here, which is another reason it's a great houseplant.
- Temperature: Standard room temperatures (60-80°F / 15-27°C) are perfect. Avoid drafts from heaters or air conditioners. They can tolerate down to 50°F (10°C) but won't grow.
- Humidity: Average home humidity is fine. They don't need the high humidity many tropical plants crave. Bathrooms with great light can actually be a good spot.
- Feeding (Fertilizing): This is often overdone. Aloes are light feeders. Feed only during the active growing season (spring and summer) with a half-strength balanced liquid fertilizer (like a 10-10-10) once a month at most. Do not fertilize in fall and winter. More is not better—it can lead to weak, leggy growth.
How to Propagate Your Aloe (Make More Plants)
A healthy aloe will produce offsets, called "pups." These are clones of the mother plant that grow from the base. Here's how to separate them.
Wait until the pup is a decent size, about one-quarter to one-third the size of the mother plant, with a few leaves of its own.
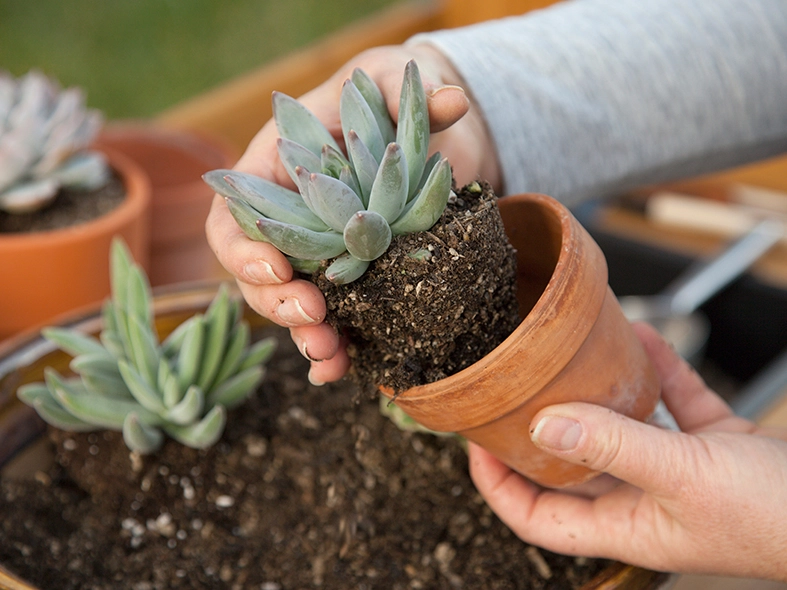
- Remove the entire plant from its pot and gently brush away soil to expose the base of the pup and its connection to the mother.
- If there are roots, you can often gently twist the pup away. If it's firmly attached, use a clean, sharp knife to cut it away, ensuring the pup keeps some roots if possible.
- Let the pup sit in a dry, shady spot for 1-2 days. This allows the cut to callous over, which is critical to prevent rot when you plant it.
- Plant the calloused pup in a small pot with your fast-draining soil mix. Don't water it for about a week, then water lightly. Treat it like a mature plant once you see new growth.
Diagnosing and Fixing Common Aloe Problems
Here’s a quick-reference table for the issues you're most likely to face.
| Symptom | Likely Cause | How to Fix It |
|---|---|---|
| Soft, mushy, brown leaves | Root rot from overwatering. | Stop watering immediately. Unpot, remove all black/mushy roots and leaves. Repot in fresh, dry soil. Wait 1-2 weeks before a light watering. |
| Thin, curled, dry leaves | Underwatering. | Give the plant a thorough soak using the "soak and dry" method. It should plump up in a few days. |
| Brown, crispy leaf tips | Too much direct sun (sunburn) or chemical burn from fertilizer/water. | Move to a spot with bright but slightly filtered light. Use distilled or filtered water if your tap water is very hard. Flush soil with water to remove fertilizer salts. |
| Pale, leggy, stretched-out growth | Not enough light (etiolation). | Gradually move to a much brighter location. The existing growth won't fix itself, but new growth will be compact. |
| Reddish or purple tinge | Often a sign of stress from intense sun or cold. Can be normal for some varieties. | If accompanied by crispy spots, it's sunburn—provide slight shade. Otherwise, it may just be a "tan" and is harmless. |
Your Aloe Care Questions Answered
Why are the tips of my aloe plant turning brown and dry?
This is incredibly common and usually one of two things. First, check if it's sitting in a hot, south-facing window with no filter—it might be getting literally scorched. Second, and more likely for indoor plants, it's a reaction to minerals (like fluoride or chlorine) or salts in tap water. The plant pushes these to the leaf tips, causing burn. Try switching to distilled, rainwater, or filtered water for a few months and see if the new growth comes in clean.
Can I use the gel from my indoor aloe plant on my skin?
You can, but with a caveat. The fresh gel from a healthy leaf is generally safe for minor burns or sunburn. However, the yellow latex (aloin) that oozes out just under the leaf skin can be a skin irritant. Slice a leaf from the bottom of the plant, stand it upright in a cup for 10 minutes to let the yellow sap drain, then rinse the leaf and slice it open to scoop out the clear inner gel. Do a patch test first if you have sensitive skin.
My aloe is growing sideways/leaning heavily. What should I do?
This is almost always a light issue. The plant is stretching (etiolating) towards the light source. Rotate the pot a quarter turn every time you water to encourage even growth. If it's severely leaning, you may need to stake it gently and move it to a significantly brighter spot. The new growth will correct itself, but the old, stretched stem won't shrink back.
How often should I repot my aloe vera?
Only when necessary. Signs include: roots growing out of the drainage holes, the plant becoming top-heavy and tipping over, or the soil deteriorating and not draining well anymore. For a moderately growing aloe, this might be every 2-4 years. They actually perform better when slightly pot-bound. Spring or early summer is the best time to repot.
Is it normal for the bottom leaves to die?
Yes, to a point. As an aloe grows new leaves from the center, the oldest, outermost leaves will naturally brown, dry up, and can be gently pulled away. This is the plant's renewal process. However, if multiple leaves at different levels are dying rapidly, that's a sign of a problem—usually overwatering or a severe lack of light.

Comments