Replanting aloe vera isn't rocket science, but get it wrong, and you might end up with a dead plant. I've seen it happen—folks follow generic advice, then wonder why their aloe turns mushy or stops growing. After years of growing succulents, I've learned that timing and technique matter more than most guides let on. Let's cut through the noise and get your aloe thriving.
What You'll Learn in This Guide
Why Replant Aloe Vera? It's Not Just About Space
Most people think repotting is only for when the plant outgrows its pot. Sure, that's part of it, but there's more. Aloe vera roots can get cramped, leading to poor nutrient uptake. Worse, old soil breaks down and holds too much moisture, which succulents hate. I once kept an aloe in the same pot for three years—it survived but barely grew. When I finally repotted, the roots were circling the bottom, a classic sign of being pot-bound.
Signs Your Aloe Vera Screams for a New Home
Look for these clues. If you see roots poking out of drainage holes, that's obvious. But less obvious: slow growth, leaves turning pale, or the plant tipping over easily. Another sneaky one—water drains too fast after watering. That means the soil is exhausted. Don't wait until leaves wilt; by then, root rot might have set in.
Pro tip: Check the soil surface. If it's crusty or has white salt deposits, the soil is old and needs replacement. This often gets overlooked in basic guides.
When to Replant Aloe Vera: Skip the Guesswork
Timing can make or break your replanting success. Many sources say spring is best, and they're right—but why? Aloe vera is actively growing then, so it recovers faster. I tried repotting in fall once; the plant just sat there for months, barely putting out new leaves. If you live in a warm climate, early summer works too. Avoid winter unless it's an emergency, like severe root rot.
Here's a table to break it down:
| Season | Suitability for Replanting | Reason |
|---|---|---|
| Spring | Best | Active growth period; roots establish quickly |
| Summer | Good (in mild climates) | Warm temperatures aid recovery |
| Fall | Fair | Growth slows; risk of transplant shock increases |
| Winter | Poor | Dormant period; high chance of rot from cold, wet soil |
If your aloe is in distress—say, from overwatering—replant immediately regardless of season. Better to risk shock than let rot spread.
Step-by-Step Guide to Replanting Aloe Vera
Let's walk through the process. I'll share a trick I picked up from a local nursery owner: use terracotta pots, not plastic. Terracotta breathes, reducing overwatering risks. Plastic pots trap moisture, and that's a death sentence for aloe if you're heavy-handed with water.
Tools and Materials You'll Need
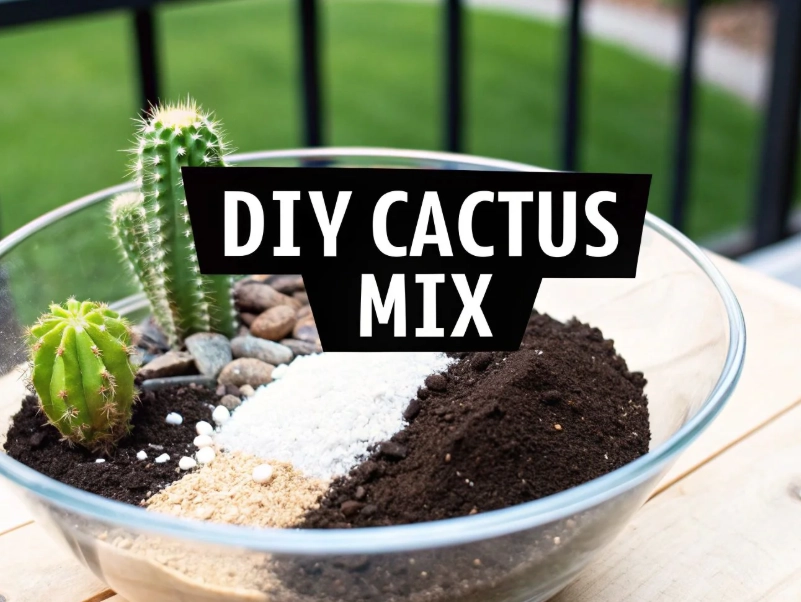
Gather these before starting. A dull knife can tear roots, so use a clean, sharp one. For soil, don't just grab any cactus mix—some are too peaty. I mix my own: two parts potting soil, one part perlite, one part coarse sand. The Royal Horticultural Society notes that well-draining soil is critical for succulents.
- New pot (1-2 inches larger in diameter than the old one)
- Well-draining soil mix (cactus/succulent blend or DIY)
- Sharp knife or scissors
- Gardening gloves (aloe sap can irritate skin)
- Watering can with a narrow spout
- Newspaper or tarp for mess control
Step 1: Removing the Plant Gently
Water the aloe lightly a day before—this makes roots more flexible. Tilt the pot and gently squeeze the sides. If it's stuck, run a knife around the inner edge. Don't yank the plant; you'll snap roots. I learned this the hard way with a mature aloe; it took months to recover from root damage.
Step 2: Inspecting and Treating the Roots
Shake off old soil. Look for dark, mushy roots—that's rot. Cut them off with sterilized scissors. Healthy roots are firm and light-colored. If there are offsets (pups), you can separate them now. Twist them off or cut with a knife, ensuring each has some roots. Let the cuts callus over for a day before replanting; this prevents infection.
Step 3: Preparing the New Pot and Soil
Choose a pot with drainage holes—non-negotiable. Add a layer of gravel or broken pottery at the bottom for extra drainage. Fill with fresh soil mix, leaving room for the root ball. Press the soil lightly; don't compact it. Aloe roots need air pockets.
Step 4: Replanting with Care
Place the aloe in the center. Spread roots out gently. Add soil around, firming it slightly. The base of the leaves should sit just above soil level. Burying leaves invites rot. Water sparingly—just enough to settle the soil. I wait 3-4 days before a full watering, contrary to common advice to water immediately. This reduces rot risk.
Step 5: Aftercare for Success
Keep the plant in bright, indirect light for a week. No direct sun yet—it's stressed. Resume normal watering after a week, but only when soil is dry an inch deep. Fertilize after a month with a diluted succulent fertilizer. Over-fertilizing right away burns new roots.
Common Mistakes and How to Avoid Them
Everyone makes errors, but some are preventable. Using too big a pot is a classic. Aloe likes being snug; excess soil stays wet, causing root rot. Another: replanting when the plant is flowering. It diverts energy from root establishment. I did this once, and the flowers dropped off quickly.
Also, avoid watering on a schedule. Check soil moisture with your finger. In humid climates, water less. The University of Florida IFAS Extension emphasizes that overwatering is the top killer of container succulents.
Case Study: Rescuing an Overwatered Aloe Vera
Last year, a friend gave me an aloe with yellow, soft leaves. It was in a plastic pot with no drainage, sitting in soggy soil. I replanted it immediately, even though it was winter. Removed all rotten roots—about half were gone. Used a terracotta pot and my DIY soil mix. Didn't water for a week. After two months, new firm leaves emerged. The key was acting fast and not over-babying it post-replant.


Comments