You bought that plump aloe vera plant for its promise of easy care and handy gel. Now its leaves are thin, bending sideways, or sporting ugly brown spots. Sound familiar? Most aloe care advice misses the mark because it treats the plant like any other succulent. The truth is, aloe leaves are sophisticated water and nutrient storage units, and their condition tells you everything. Getting it right means understanding what those thick, fleshy leaves actually need—not just following generic "bright light and little water" rules. Let's fix that.
What You'll Learn in This Guide
Understanding Aloe Leaves: More Than Just a Gel Factory
Think of an aloe leaf as a self-contained survival pod. The outer green rind is tough, lined with a bitter yellow sap called aloin (a potent laxative—more on that later). Inside, the clear mucilaginous gel is mostly water, packed with vitamins, enzymes, and polysaccharides. This structure dictates everything.
Most people get the light part wrong. Yes, aloes love sun, but a sudden move from a dim store shelf to a south-facing window will scorch leaves, leaving permanent pale or brown scars. The leaves are essentially solar panels that also store water. If the water reserves are low and the sun is too intense, it's like running an engine without coolant.
I learned this the hard way with a prized Aloe aristata. I placed it in what I thought was "perfect" direct sun. Within a week, the leaves looked bleached and felt papery. The damage was done. The plant survived, but those leaves never fully recovered their deep green color.
The Non-Negotiable Care Routine for Thriving Aloe Leaves
Here's where standard advice falls short. You can't just "water when dry." You need a system.
How to Water Aloe Vera Correctly (The Soak & Desert Method)
Forget the ice cube trick or weekly sprinkles. Aloe roots need a thorough drenching followed by a complete drought. Here's my method:
Take the plant to the sink. Water it slowly until water flows freely from the drainage hole. Let it sit there, draining, for another 10 minutes. Then, put it back in its sunny spot. Now, do not water again until the entire pot of soil is bone dry. Stick your finger deep into the soil. If there's any coolness or dampness, wait. In winter, this might mean 4-6 weeks between waterings.
Underwatering is safer than overwatering. A thirsty aloe will pull moisture from its lower leaves, making them thinner and slightly concave. That's your cue. Overwatering, however, rots the roots first, and by the time the leaves turn mushy, the problem is often severe.
The Right Soil and Pot: Your Foundation for Healthy Leaves
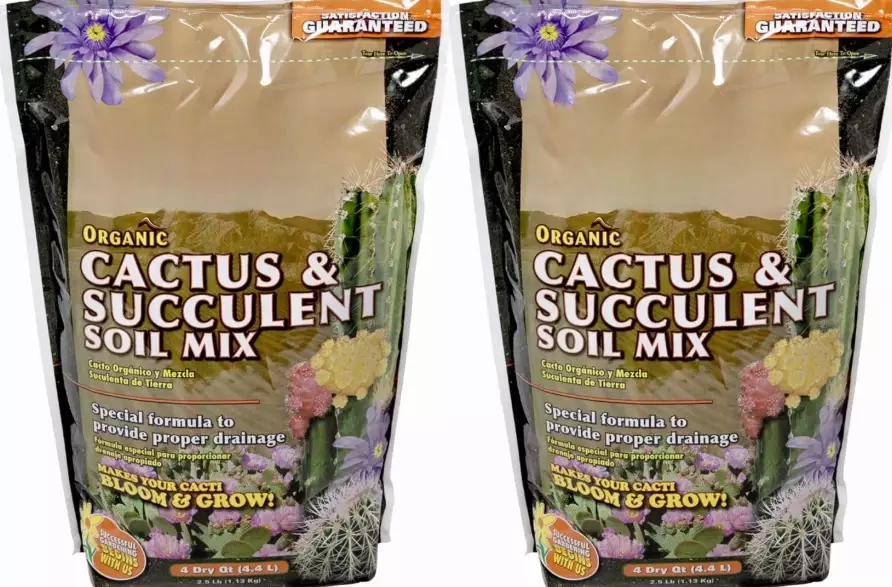
Regular potting soil is a death sentence. It holds moisture too long. You need a gritty, fast-draining mix. I use a simple 50/50 blend of a quality cactus & succulent mix and additional perlite or coarse sand. The pot must have a drainage hole. Terracotta pots are ideal because they wick away extra moisture.
A pot that's too large is a common mistake. Excess soil stays wet for too long, encircling the roots in moisture. Choose a pot that gives the roots only an inch or two of space around them.
Light Requirements for Firm, Colorful Leaves
Bright, indirect light is the sweet spot. An east or west-facing window is perfect. A south window is fine, but you might need to diffuse the strongest afternoon sun with a sheer curtain, especially in summer. If your leaves are turning brownish or reddish, that's "stress coloring" from intense light—not necessarily bad, but a sign to monitor for scorching. If they're long, floppy, and a dull green (etiolation), they desperately need more light.
| Leaf Symptom | Likely Cause | Quick Fix |
|---|---|---|
| Soft, mushy, translucent leaves | Overwatering / Root Rot | Stop watering immediately. Check roots. Repot in dry mix. |
| Thin, wrinkled, curling leaves | Underwatering | Give a thorough soak. Leaves will plump up in 1-2 days. |
| Brown, crispy leaf tips | Low humidity / Salt buildup | Trim tip. Flush soil with water every few months. |
| Pale, bleached spots | Sunburn | Move to gentler light. Damaged areas won't recover. |
| Long, stretched, weak growth | Insufficient Light | Gradually move to a brighter location. |
Harvesting and Using Aloe Leaves Safely
This is the rewarding part, but you have to do it right to avoid harming the plant or yourself.
How to Harvest Without Hurting Your Plant
Never harvest more than one or two leaves at a time, and always choose the oldest, outermost leaves. These are the most mature and contain the most potent gel. Using a clean, sharp knife, cut the leaf as close to the main stem as possible. A clean cut heals faster. The plant will seal the wound. Don't harvest from a small, young plant—wait until it has at least 8-10 healthy leaves.
After cutting, stand the leaf upright in a glass or bowl for 15-20 minutes. Let the yellow sap drain out. Then, rinse the leaf under cool water. Pat it dry. Now you can fillet it: lay it flat, cut off the serrated edges, and slice off the top and bottom green rind to reveal the clear gel inside. Scoop it out with a spoon.
Practical Uses for Fresh Aloe Vera Gel
Fresh gel lasts about a week in the fridge in an airtight container. For longer storage, freeze it in ice cube trays.
- Sunburn Soother: This is its classic use for a reason. Apply the chilled gel directly. It provides a cooling sensation and helps hydrate the skin. (Note: For severe burns, seek medical attention. Aloe is a comfort measure, not a cure.)
- Minor Cuts & Scrapes: Its antimicrobial properties can help keep small wounds clean. Apply a thin layer.
- DIY Hair Mask: Mix a few tablespoons of gel with coconut oil for a hydrating scalp and hair treatment. Rinse thoroughly after 30 minutes.
- Leaf Polish: Rub the inner gel gently on the leaves of other houseplants like Monstera or Fiddle Leaf Fig. It cleans dust and gives a healthy shine. Just test on a small area first.
I keep a frozen cube or two on hand during gardening season for inevitable nicks and bug bites. The cooling effect is immediate.
Troubleshooting: Reading Your Aloe's Leaf Language
Aloe leaves communicate. Your job is to listen.
Why are the bottom leaves dying? This is often normal senescence. As the plant grows new leaves from the center, the oldest outer leaves naturally dry up and die. Simply peel them off gently. If multiple leaves are dying at once, check for overwatering.
Leaves bending or drooping? Usually a light issue. The plant is stretching towards the light source. Rotate the pot a quarter turn every time you water to encourage even growth. If the leaves are too heavy and bend from their own weight, the plant might need more light to grow stronger.
Brown spots or soft spots? Could be fungal disease from water sitting on the leaves (always water the soil, not the plant) or physical damage. Cut out the affected area with a sterile knife if it's localized.
Your Top Aloe Leaf Questions, Answered
Can I cut a bent aloe leaf to make the plant look better?
Is the gel from all aloe species safe to use on skin?
My aloe leaves are thin even though I water regularly. What's wrong?
How do I get my aloe to grow more leaves instead of just getting taller?
Can I put an aloe leaf directly in soil to propagate a new plant?
Aloe leaves are remarkable. They're the plant's lifeline and, with a little understanding, can become a reliable part of your home apothecary. Stop treating your aloe like a decoration that needs occasional attention. Start reading its leaves. They'll tell you exactly what they need, and in return, they'll provide that cool, soothing gel for years to come. The goal isn't a perfect, magazine-ready plant, but a resilient, healthy one that works with you.


Comments